Get yourself to do something if you want to do it right. It has always been said and for good reason.
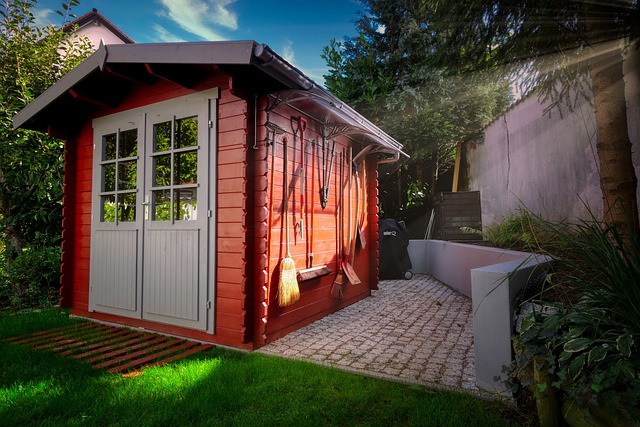
Well, the saying goes perfectly well while you are looking to build a shed to store your belongings in the backyard. You could buy one for yourself but they are so overpriced compared to what you could build it for (including your labor charges). Additionally, you will not be able to design according to your will, you might not be pleased with the look on being delivered. But if you want to build a shed, you should do it like an industrial shed builder.
Intimated? Don’t worry we’ll help you with the steps.
STEP 1
1. First, dig two trenches 16 inches. wide, 12 inches. deep, and 13 ft. long and center the trenches 66 inches. apart.
2. Then compact it with a hand tamper before filling in the trenches with a 3 inches layer of gravel, and repeat the process till you have filled the trench.
• Cut the treated 6x6s to 12 ft. and set them on the gravel in such a manner that they’re parallel and the outside edges are 6 ft. apart.
STEP 2
1. Start by nailing the perimeter together and adding the center stud. You can then mark the remaining studs by measuring from the center stud.
2. It’s better to build the wall on a flat surface.
STEP 3
1. Before you make the wall stand, nail the sidings to it.
2. Use metal Z-flashing to cover the horizontal steam to keep it out of the water.
STEP 4
1. Screw the front wall to the platform to make it a square before you add the siding. Then align the bottom plate with a chalk line to make sure it’s straight.
2. Draw chalk lines 3-1/2 inches. from the edges of the platform on the plywood deck, to indicate the inside edge of the walls. Measure to make sure that the lines are 89 in. apart and parallel. Then chalk a line down the center to make sure the angled top plates meet there.
• Snap lines for the peak.
3. First, fill the center studs and nail on the siding. Then cut 2x4s to fit inside the lines and toe-screw them to the plywood from the outside so the screws are accessible after the siding is installed.
4. Trim off the top corner to follow the slope of the angled top plate after you nail on the siding so that it overhangs the framing on each side by 3-1/2 inches.
5. When you’re done building the front and back walls, place them on the floor so you can use the platform to build the roof sections.
STEP 5
1. Start by cutting out the rafters but omit the bird’s-mouth from four rafters and use them on the ends.
2. Mark the rafter positions on the ridge after you cut the 2x4s for the ridge and sub fascia to length and nail through the ridge and sub fascia with 16d nails to secure them.
STEP 6
1. Before you tack the platform with three or four places with toe screws, draw a chalk line on it to hold the frame straight while you install the soffit.
2. To save the hassle of upside-down nailing in a confined spot add the soffit to the roof frame while it’s on the platform.
• Nail the soffit to the roof frame with 6d galvanized box nails and then mount an inexpensive carbide blade on the circular saw to cut the fiber cement.
3. Set the roof panel aside and similarly build the other half.
STEP 7
1. Hold the walls straight and add the sides and the front starting with the back wall.
2. Don’t forget to nail each wall to the platform as you go and lock the corners together by nailing through the overhanging siding into studs.
• Drive a few 16d nails through the bottom plate to hold the bottom of the wall in position.
STEP 8
1. First, make sure the 2×4 ridge is perfectly aligned with the peak of the wall, and then slide the roof panels up until the bird’s-mouths drop over the top plate of the wall.
2. Insert a pair of toenails through each bird’s-mouth into the top plate of the wall to secure the roof panels and then finish framing by nailing the 2×4 ridges together. Then add the two 2×4 collar ties, 4 ft. apart.
STEP 9
1. Cut the gable end trim a little long first and cut the angle on the top next.
2. Tack it up parallel manner to the end rafter and mark for the bracket notch.
STEP 10
1. Build the two frames and then glue and clamp them together with pocket screws to make a 1-1/2-inches thick door. Then to hold the perimeter in place nail wood stops around.
STEP 11
1. First, rout the hinges and then clamp the door before trimming but keep the trim piece extended 1/8 inches above the door before clamping it.
2. Center the door on the opening and support the door with a temporary 2×4 screwed to the platform. Then attach the opposite side trim and finally the top.
• First, complete the door frame. Then cut the grooved plywood into 4 x 8-ft. to fit the lower recess, and cut the acrylic sheet into a piece of 1/4-in. to fit the upper recess. Mold the nails to the inside to secure the plywood and acrylic sheet with 1/2-inches x 1/2-inches. Then sand the edges of the door flush.
STEP 12
1. If you have a router, use a straight bit to cut the hinge recesses, else use a sharp chisel.
2. First clamp the trim alongside the door, making sure it extends 1/8 inches. beyond the top of the door, and then mark the hinge cutout on both the doors and the trim at the same time.
• Screw the hinges to the door and trim and then screw the trim to the wall.
3. Then add the top and side trim pieces to finish the installation
STEP 13
1. Mark out the arched window trim using a simple trammel, and then mark the curved 2×10 header and the curved bracket support similarly.
2. Mark and cut the side trim pieces.
• Then set them in place on the top piece to mark the angled cuts.
STEP 14
1. Assemble the window frame with pocket screws and route a recess on the back for the acrylic sheet
2. Rest the window on the temporary 2×4 and screw it to the wall but center on the opening before that.
• Cut the side pieces and place them over the top of the header and mark the angled cuts.
3. First, cut the angles on each end, and then saw the curves with a jigsaw. Finish the curved trim piece and sand them smooth. Use the marking jig to lay out the curved brace as well.
4. Using a router with a 3/8-in. rabbet bit, rout a 3/8-inches deep recess on the back of the window to receive the 1/4-in. Plexiglas acrylic sheet.
5. Set the window frame with the recess side down, over a piece of acrylic sheet, and trace the shape with a permanent marker then cut it with a fine-tooth jigsaw blade and the straight sections with a fine-tooth blade in a table saw or a circular saw.
• Prime and paint the window.
• Embed the acrylic sheet in a thin bead of clear silicone. Secure the acrylic sheet with glazing points and leave it to set up overnight.
STEP 15
1. Mount the brackets
2. Line up the outside edges of the lower brackets to the face of the siding and push them tight to the soffit. Then screw them into the wall.
• Push the top bracket to the soffit after placing it on the peak
3. Wrap the corners of the bracket with a corner board after finishing with the pieces that go under the bracket
4. Overlap the front on the side corner of the board.
5. Do the roofing by adding the shingle molding and the fascia boards.
• Roof, stain and then paint the shed.
• Complete the process by installing the shingles and finishing the exterior. Then prime and paint the doors before installing them, because only then can you caulk and fill the nail holes before putting another additional coat of paint on the flat surfaces.