When it comes to selling your property, creating a real estate video can be one of the most useful marketing tools to generate leads. According to research, real estate listings that have a video get 403% more inquiries than those without.
If you look for costs to get a video made for your property, professional companies who specialize in this can quote several thousand dollars. But, depending on what your budget is, you can feasibly make one for little or no budget i.e. you can use your own camera and edit yourself or alternatively get a super professional looking one for a few hundred dollars if you know how.
Let’s talk cameras
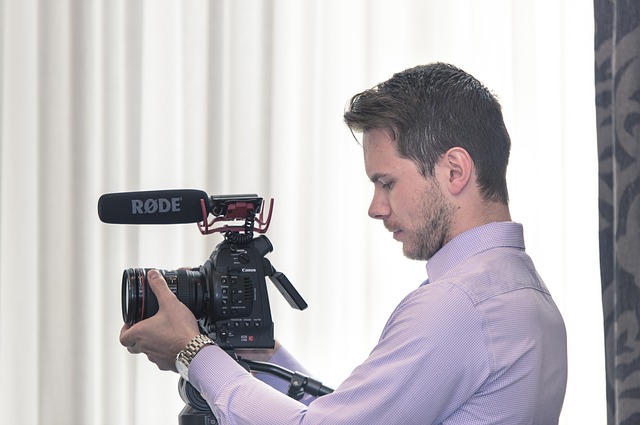
First off you need to decide what camera you will use. Getting good quality photo and video is crucial. Is this something you feel you can do yourself? Believe it or not it takes skill and experience to be able to take great looking footage. But with the ascent of the social media generation, some people have great camera skills themselves. If you are working on a lower budget, you will likely know someone with a good camera who can help you out. Ideally you want to use a wide angle lens to make the spaces feel more roomy. Alternatively, if you have a super low budget, today’s smartphones are pretty impressive and with good lighting and angles you should be able to get fairly impressive results. The new iPhone 11’s camera is on par with a lot of today’s professional cameras.
If you have some budget to play with the best way to spend this money is on getting a professional videographer. If you post you are looking for a videographer to create a video on whatever local website you use to find contractors – Craigslist, UpWork etc. if you expect them to do everything e.g. film, edit etc. the price will go up significantly. But if you just ask for a local videographer to come to your house for two hours you should be able to get someone for under $200, if you negotiate.
Nowadays, editing software has become so easy to use that anyone with basic computer skills can edit videos themselves so you are only investing in the camera guy. Ask them for a copy of their latest reel to check the quality of their work as the talent and ability of videographers varies dramatically.
Do you need a drone?
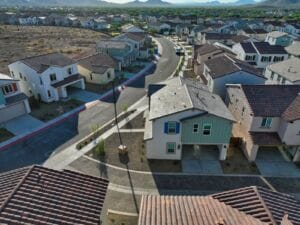
If you are selling a home or commercial building, getting a drone to take stunning aerial shots to show the prospective buyers the scope of the property goes a long way. But again, if you haggle you can get a drone camera operator to come by and film for an hour for a few hundred dollars. As always, check their latest footage to assess their ability. It is well worth hiring a drone to get those stunning aerial shots for a house or larger property. If you live in an apartment, drone shots probably aren’t as imperative.
Lights
Good lighting is what separates amateurs from the professional looking shots. If you shoot during the day, you should have enough natural sunlight that you don’t need additional lighting. But it is always good to have a few extra lamps at hand to give darker rooms a boost. Lighting looks better coming from lower level lamps than overhead lighting. If you look at Hollywood movies you will see that the light always comes from lots of lamps around the room rather than overhead lights. So have some extra lamps that you can move to every room you are taking photos in, if needed.
When it comes to lighting, too much or too little is always a bad thing. In fact, a cloudy day is the best day to take interior shots. If you are taking drone footage, there is an expression in lighting called “Magic Hour” – it is the time just after sunrise or just before sunset where the lighting is best for filming. I would recommend using magic hour in the morning instead of the evening because in the evening it quickly gets darker and then you can’t shoot at all, but in the morning it gets brighter so you at least have light.
Preparing your house
So now you know what tools you are going to use, next up you need to prepare the house for the shoot. Your house needs to look at its absolute prime. It needs to be immaculately clean with all the clutter removed, cushions positioned perfectly, bedspreads laid out perfectly, towels hanging in total symmetry. It may even be worth borrowing or buying some bedspreads or cushions etc. to make your house look more appealing. Ultimately you should make your house look so good you even reconsider whether or not you want to sell!
Now you need to consider all the shots you need to take. The main photos you will want to take are of:
• Exterior shots of the house
• Main Living Area
• Kitchen
• Master Bedroom
• Garden (if you have one)
These are the ones you really want to nail and make sure you have lots of great shots of.
And Action!
When everything is ready, you can begin filming. Take some test shots of each room to see what it looks like. How does the lighting look? Too dark? Put in some lamps! Too strong? Close some curtains. Then when you have the right lighting begin to take your actual footage. You want to give people a realistic sense of what each room looks like.
Framing
Framing is how you set up the shot – what is in it, what is not. Getting attractive framing makes the difference between OK shots and ones that make people want to come over and see it. You don’t want too much ceiling or floor. Look at other videos of real estate videos to see how they frame their shots and follow suit.
Motion
If you are filming you will want to put some motion in your shots. If you are using your smartphone you can do these by holding the camera steady in your hands and using your body as the thing that creates motion e.g. if you are taking a motion shot – hold the camera steady in your hands and walk slowly. With motion, it is better to go as slow as possible when taking shots. Over exaggerate how slow you move the camera. You can always speed it up in the edit but it is harder to edit shots that have been taken too fast.
The types of motion shots you want to consider are:
Walking into a room – walking slowly from outside a room with the door open to inside to reveal the room inside.
Reveal shots – stand a few feet outside the door of the room you want to introduce and film from the wall and keeping the camera in a horizontal line film to move across the door and reveal the room. You can do these types of shots in all sorts of ways e.g. you can introduce a room by showing the close up of a vase and then moving the camera to show the dining room table etc.
Pan – this is when you move the camera left to right or right to left to show the length and width of a space. If you don’t have a tripod to keep things smooth then you can use your body. But hold your camera still in your hands and use your body to create the motion e.g. turn your body and let the camera follow with your hands – this creates a much smoother shot.
Walk Through
If you want to give your viewers a sense of the house, you can create a walk through. If you imagine that when someone is watching the video that they have a full sense of what your house is like e.g. they see exterior shot to opening the front door to show the hallway. Then going from there to see the rooms in whatever order they are laid out in your house. You will need to plan for these types of shots and then of course take them!
Editing
Now you have all your shots taken, next up you need to edit.
Taking out the bad shots
When you add all your content to your editing tool, take out all the bad shots or cut out the places where you were setting up or finishing a shot where the camera wobbles or people are talking.
Focus on the good
Then arrange your shots in the best order – put the best ones up front. Most people decide within a few seconds whether they like something or not. And arrange the shots in a reasonable flow – as we discussed in walkthrough – going from exterior to interior. Downstairs to upstairs etc.
Sound
You will want to unlink your sound and delete it. People don’t need to hear you talking or your dog barking. But do add music! Adding music really adds to the production value and makes it more appealing. Clipchamp has music already integrated into our platform but you can find music on websites such as Pond5.
Adding text
You will want to add text to give more details about the house – perhaps an opening or closing still with all the necessary details e.g. location of house, price, who to contact etc.
Then as you go to each room you may want to add graphics to clarify what people are seeing e.g. Living Room, Master Bedroom, Ensuite
Length
Even if you have taken tonnes of great footage, ideally you want to keep your video under two minutes. Even getting all the best parts into thirty seconds. Most people drop off watching videos within 10 to twenty seconds.
Thumbnail
Finally, the thumbnail is the main placeholder video that appears before people click on your video. It is one of the biggest selling tools that make people decide “Oh, I want to check out this video” so make sure you choose the most appealing shot of all for this!
And that’s it. Hopefully, these videos will help generate lots of leads for you but bear in mind that a great video can’t sell a house that is overpriced etc, there are many factors that contribute to whether or not a house sells.
Anna Ji is the director of product and growth at Clipchamp, a video platform being used by over 7 million people worldwide, to create beautiful content on microbudgets.


