
Numerous users face storage-related problems when their disk capacity reaches its maximum or when they require quicker speeds. SSD upgrades or HDD replacements become considerably simpler when you know how to migrate Windows to a new drive and skip reinstallation.
The transition of your operating system becomes seamless after eliminating the need for manual Windows installation and driver reinstallation plus software restorations.
This guide demonstrates the process of Windows migration to a new storage device through 4DDiG Partition Manager while covering the Windows System Image Tool built-in method.
FOOD NEWS: 10 celebrity chef restaurants to try in Arizona
Part 1. Can You Relocate or Move Windows to Another Drive?
The operating system of Windows can be transferred between drives without demanding a complete operating system reinstall.
There are two primary methods:
- 4DDiG Partition Manager delivers an effortless OS migration process from current storage to new SSD or HDD drives through its dedicated third-party tool.
- You can use the Windows System Image Tool which allows backup generation for system restoration on another drive as a built-in Windows tool.
OS migration tools make it possible to automatically move everything while manual installation forces you to adapt settings and reinstall software before achieving Windows functionality on the new storage drive.
Part 2. How to Migrate Windows to a New Drive? Standard & Efficient Ways
If you want to migrate the operating system to new drive, you mainly have 2 methods. The first one and the recommended method is using 4DDiG Partition Manager since it provides a user-friendly experience. The second method is using the Windows System Image Tool.
In this section we will introduce both methods and provide detailed steps to perform the migration.
Using 4DDiG Partition Manager
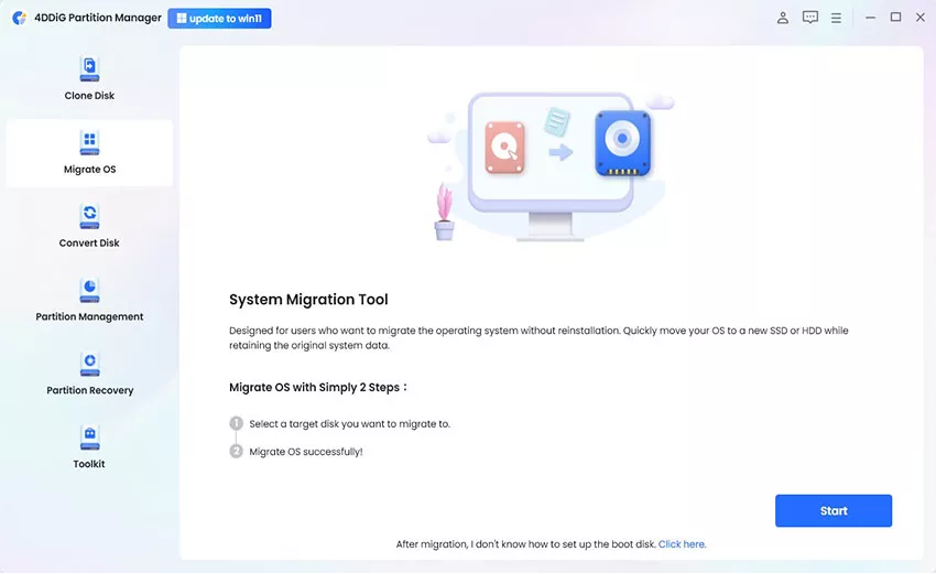
The Migrate OS function in 4DDiG Partition Manager lets users move Windows system files together with system files across new SSD or HDD devices without platform installation. The feature ensures that system configurations together with installed programs and personal data stay unaltered.
Key features:
OS Migration in 4DDiG Partition Manager includes the following main capabilities:
- One-click OS migration to a new SSD/HDD.
- No data loss during the migration.
- Supports cloning to smaller or larger drives.
The software allows users to verify the successful startup of Windows after completing a migration process.
Steps to Migrate OS to A New Drive
- Connect the new drive to your computer after launching the 4DDiG partition manager and select “Migrate OS” then click “Start”
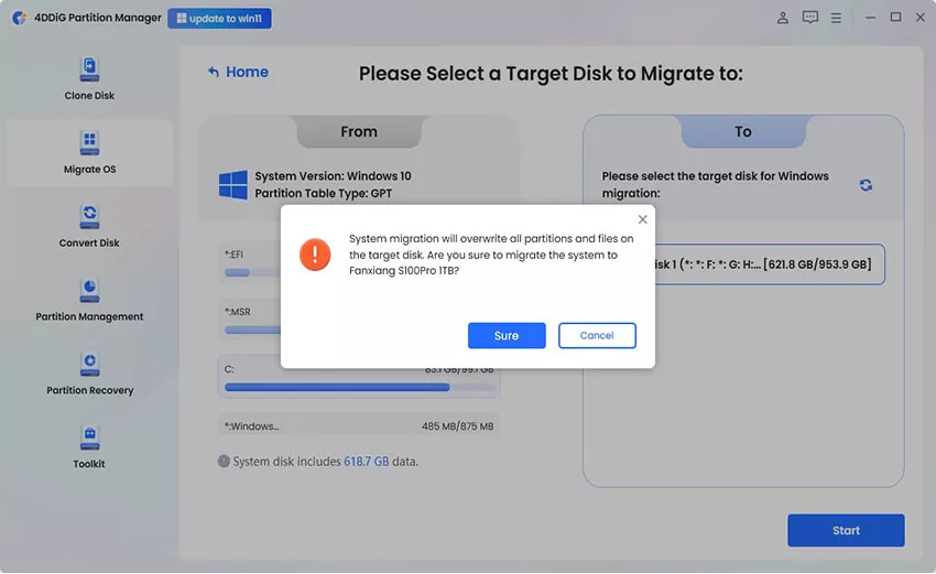
- Now, you will select your target disk and click “Start”. A pop-up will appear. Click “Sure” then” Start” and “Start” again to begin the process.
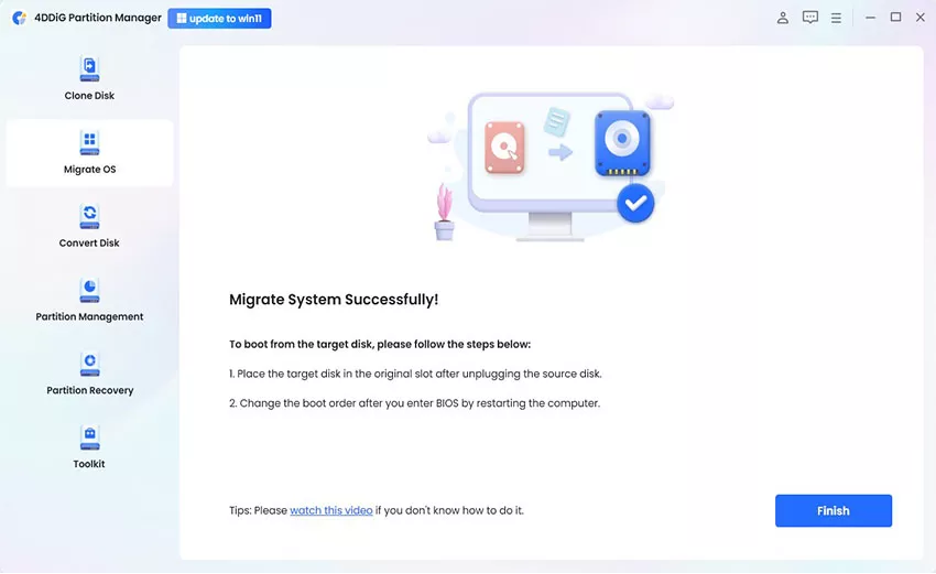
- Wait as 4DDiG migrates your OS to the new drive and click “Done” once the process is finished.
Using Windows System Image Tool
This method uses a built-in tool that comes with the Windows operating system. It allows you to create a system image of your old drive and restore it to the new drive.
Although the experience is not as seamless as the 4DDiG Partition Manager software, it gets the job done without needing any additional software.
Steps to Migrate OS to A New Drive
- Connect an external drive to your PC and make your backup for the system image by going to Control Panel, System, Security, and choose “Backup and Restore”
- “Create a system image” and choose “Set up backup”. Now select your new drive as the destination and click “Next”
- Create the backup of your choice or “let Windows choose” then proceed by clicking “Next” and then “save settings and run backup”
- Connect another USB to your computer and run “recovery drive” command after pressing “Win + S”. Here you will check mark the “Backup to recovery drive” option then click “Next”. Now select your USB as target, click “Next” and finish the process with on-screen instructions.
- Turn off your computer to remove the old drive and connect the new drive and the USB to the computer while you boot into the BIOS. Now click “Next” > “Next” and pick “Repair your computer”. The next step will be choosing “Troubleshoot” > “Advanced options” and finally “System Image Recovery”
- Now you will see the latest backup. Here you need to check the option that says, “format and repartition” then click “Next”. Click “Yes” and finally press “Finish” to complete the process. Now you only need to wait while Windows takes care of the rest.
Part 3. What Else Can 4DDiG Partition Manager Do?
4DDiG Partition Manager delivers different robust functions that help users control their storage drives and optimize performance and recovery abilities through their storage drives.
This tool provides all essential features for partition management which enable users to clone disks while also resizing partitions and formatting and restoring partition space.
- Disk Cloning – Copy an entire drive with ease.
- Partition Resize – Expand or shrink partitions without data loss.
- Disk Format & Delete – Manage partitions efficiently.
- Partition Recovery – Recover lost partitions in case of accidental deletion.
4DDiG Partition Manager allows users to perform multiple disk functions through its single platform that includes partition cloning and deletion and volume resizing and creation. The tool serves as a convenient and successful disk management solution that addresses all storage upgrade and disk troubleshooting requirements.
Part 4. Additional Tip: How to Keep Windows Running Smoothly on the New Drive
The following tips will help your system operate optimally after migrating Windows to a different drive:
- Install the latest OS patches by running Windows Update.
- Drive performance will improve after updating the drivers for storage graphics and chipsets.
- Use Storage Sense to automatically remove junk files from your computer when using Windows 10/11.
- HDD users should run defragmentation while SSD users should execute an SSD drive optimization routine through Optimize Drives.
- Enabling the AHCI mode in BIOS provides better performance for users of Solid State Drives (SSD).
- You should enter the BIOS after migration if your system fails to boot up and select the newer drive to serve as the boot disk.
These tips will help you achieve quick system performance on your new storage drive while optimizing Windows system execution.
Part 5. Wrapping Up
Knowing how to migrate Windows to a new drive proves to be an accessible operation. Higher speed SSD and expanded storage upgrades can be managed effortlessly through 4DDiG Partition Manager which simplifies OS migration processes.
The software provides an error-proof system migration to a new drive that eliminates the need for a complete Windows reinstall. Get the most reliable Windows drive migration solution with the purchase of 4DDiG Partition Manager.
Meta Description for the Article
Learn how to migrate Windows to a new drive. The process for easy Windows migration to another drive requires a solution like 4DDiG Partition Manager.